
github blog 만들기 + Jenkins + slack 연동
티스토리 블로그를 옮기려고한다..
black theme을 적용하고싶었고 black theme을 설정하려니 css/html/js를 뜯어고치녜 어쩌녜하고... 나는 웹을 이제 거의 할 줄 모른다.. T.T
무엇보다 잘 정리된 글을 올해는 적어보고자 다짐했기때문이다(지금까지 너무 일기형식이었다.)
그래서 airflow+k8s를 들어가기전에 블로그를 잠깐 옮기려고한다.

티스토리 안녕... (이래놓고 md 형식 적는거 힘들어서 다시 돌아올지도 모른다ㅋㅋㅎㅎ)
1. 마음에 드는 테마 고르기
이 블로그에서 정리를 잘 해주셨다. 마음에 드는 테마를 고르고 해당 테마의 레포로 들어간다.
나는 아래 테마를 골랐다. dark/white on-off 기능이 절실히 필요했다..T.T 이게 내가 블로그를 옮기려는 이유기도 하다.
테마를 골랐으면 레포에서 fork를 눌러 복사한다.
GitHub - jeffreytse/jekyll-theme-yat: 🎨 Yet another theme for elegant writers with modern flat style and beautiful night/dark
🎨 Yet another theme for elegant writers with modern flat style and beautiful night/dark mode. - GitHub - jeffreytse/jekyll-theme-yat: 🎨 Yet another theme for elegant writers with modern flat style ...
github.com

복사 된 레포의 이름을 변경해준다.
이 때 반드시 자신의 닉네임.github.io로 해줘야한다.
그리고 잠시 후 해당 주소로 가면 된당.. 반영이 조금 느리기때문에 외않되? 하지말고 기다려야한다.. (나도 외않되?했음)
(아래는 내가 조금 파일을 수정해서 변경된 것이다)
2. 젠킨스 다운받기
그냥 github랑 젠킨스를 연동해서 한 번 써보고 싶어졌다.
사실 gihub action으로 빌드가 되기때문에 크게 젠킨스가 필요없다.. 그냥 써보는겨~
굳이 젠킨스로 빌드하려면 깃헙 웤플로우에서 build 부분제거하고 진행하면 될..지도..
jenkins 사용도 한 번 해볼겸..
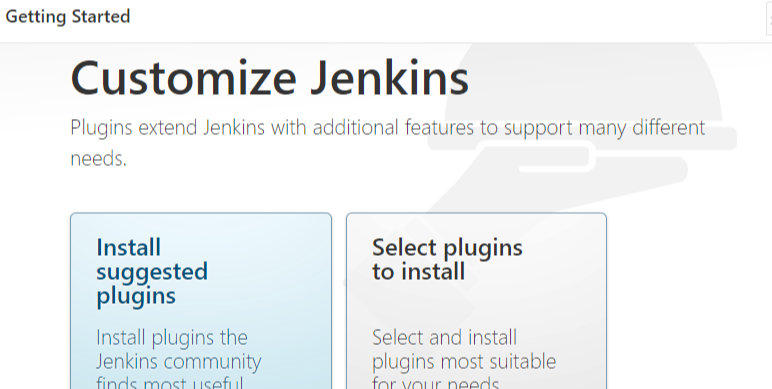
젠킨스 홈페이지에서 다운을 한다.
설정한 경로로 들어간다 (ex. localhost:8080)
그럼 아래와 같이 나오는데 해당 경로로 가면 password가 있으니 이를 입력해 넘어가자.
그 다음 제안하는 플러그인들을 설치해준다.
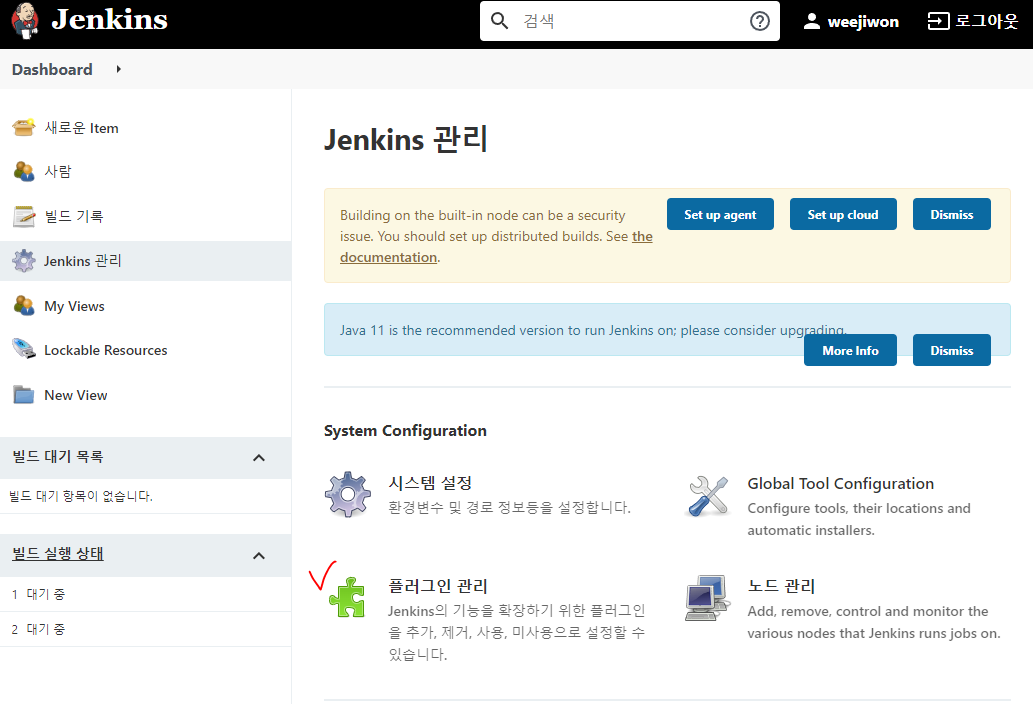
2-1. 플러그인 설치
다운받은김에 간단하게 하나만 설치하자.
Jenkins 관리에서 플러그인 관리를 클릭한 뒤 설치 가능 탭에서 Githhub Intergration을 설치한다.
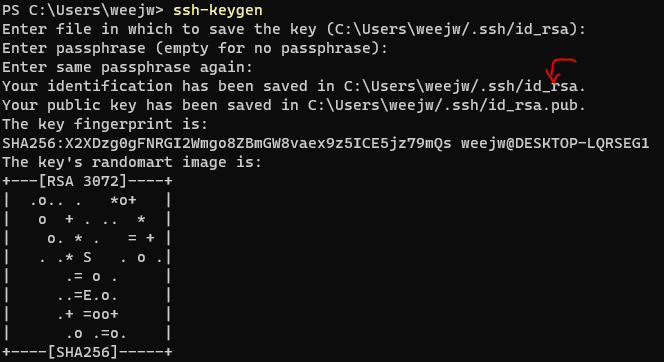
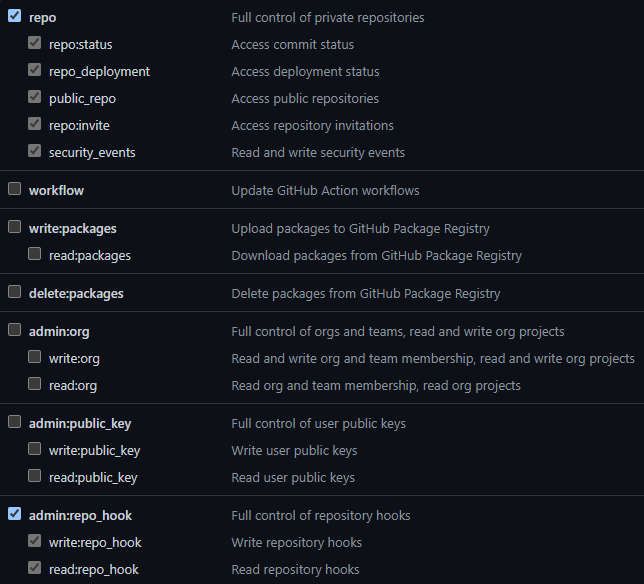
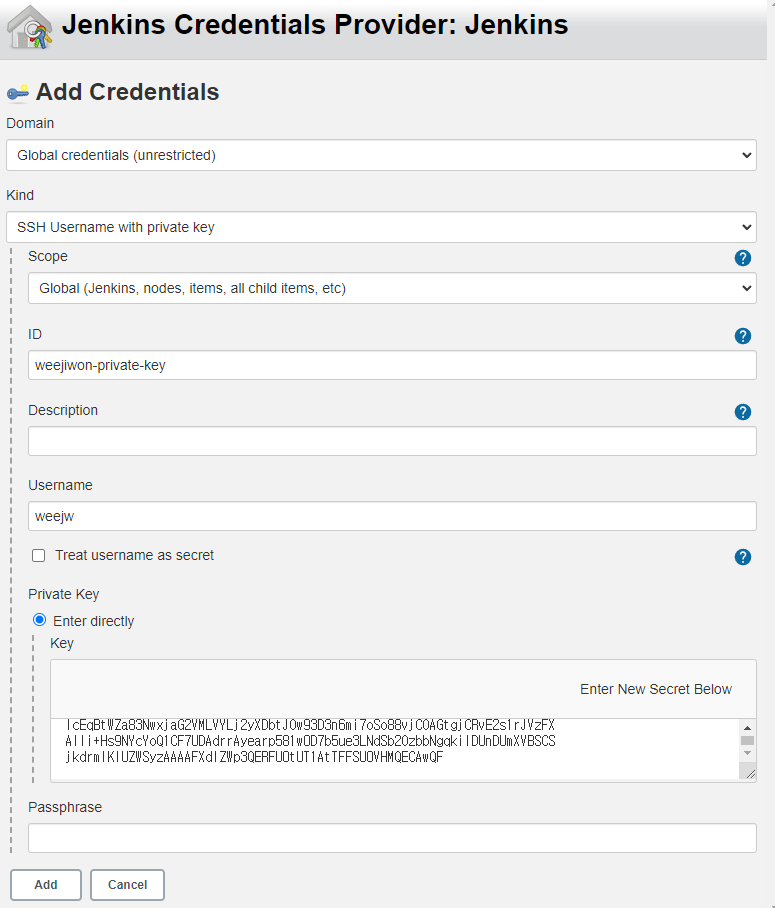
3. ssh 키를 생성
젠킨스를 띄우는 pc에서 ssh key를 생성한다.
- 공개키(.pub): repo의 Deploy keys에 사용
- 개인키: 젠킨스의 credentials에 사용
4. 깃헙 setting
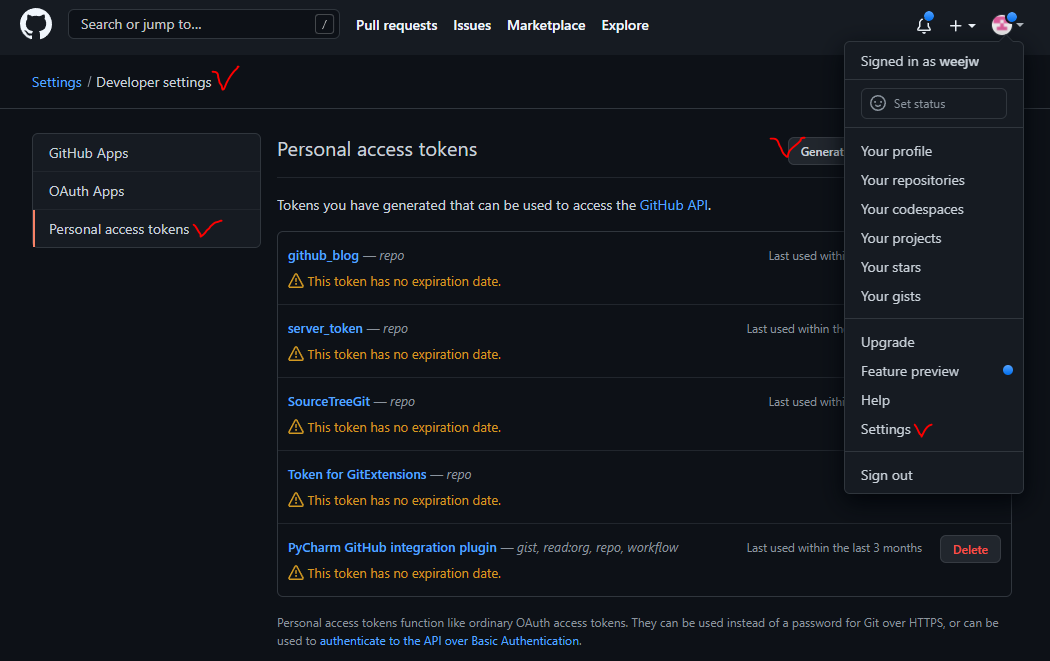
4-1) github token 발행
*추가 이 토큰은 나중에 젠킨스 환경설정에서 github server에 add key로 추가해주는것..
*추가 나중에 workflow를 수정할 일이 있다(slack 사용) 이를 위해 workflow도 추가해주는게 좋음
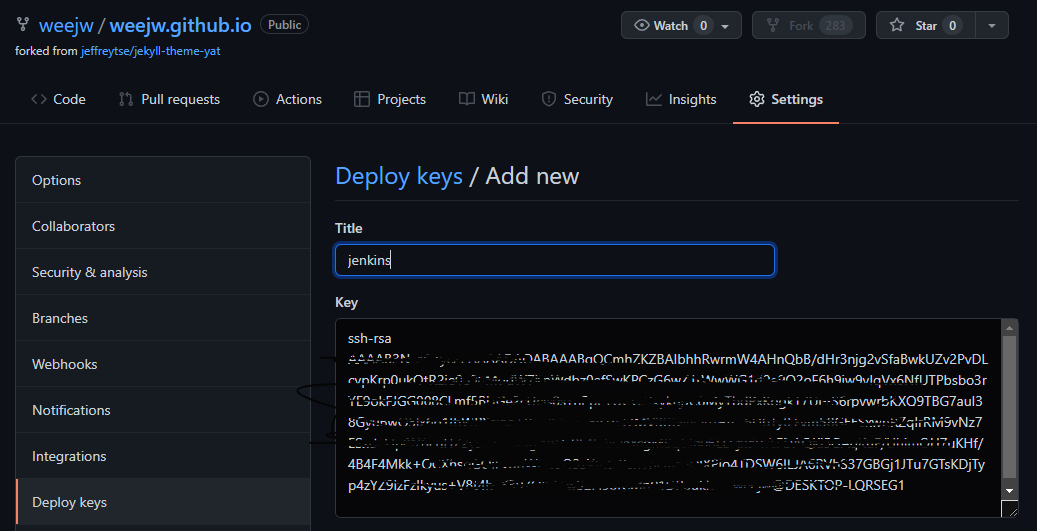
4-2) public key를 deploy keys에 추가
위에서 생성한 public key를 repo deploy keys에 추가한다.
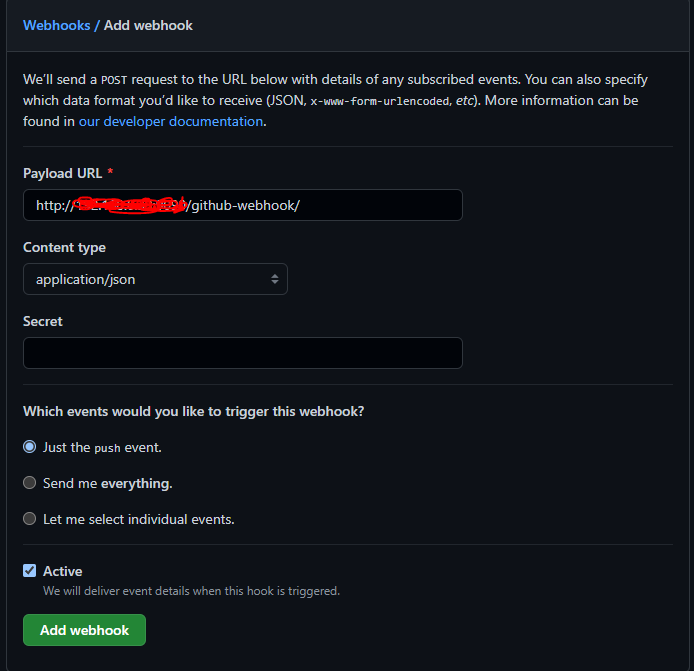
4-3) webhook 설정
payload URL에 젠킨슨 주소/gihub-webhook 이라고 적어주면 된다.
* 아래 URL은 젠킨스 환경설정에서 Location에서 변경할 수 있음! 지금해도 되고, 이따가 젠킨슨 설정할 때 한번에 해도된다. ㅎ_ㅎ 편한대로~

5. 젠킨슨 설정
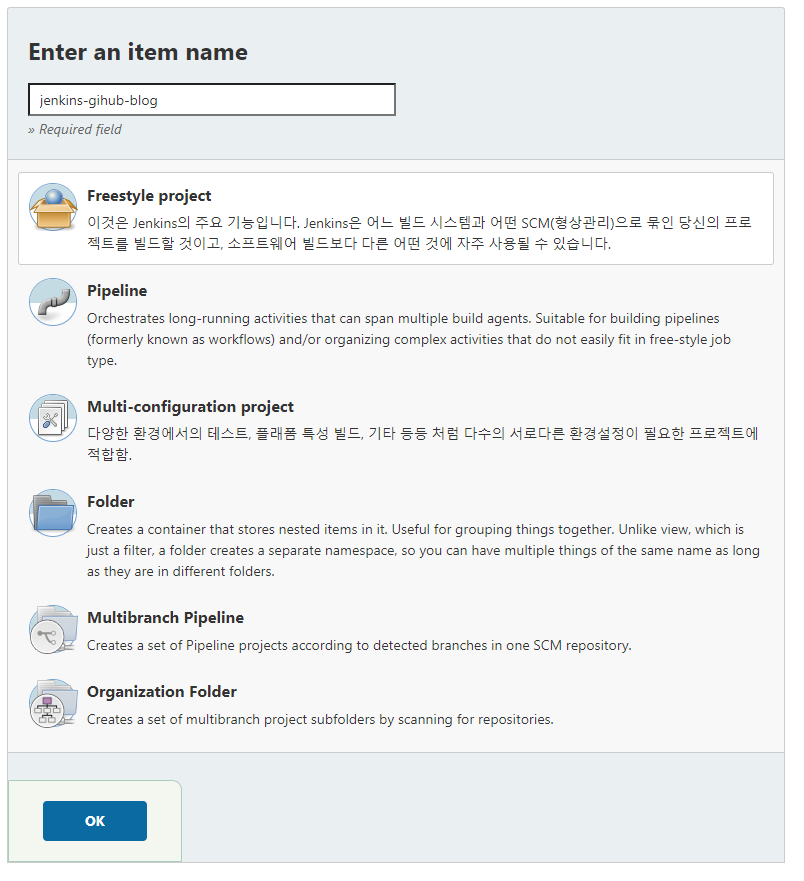
5-1. repo 추가
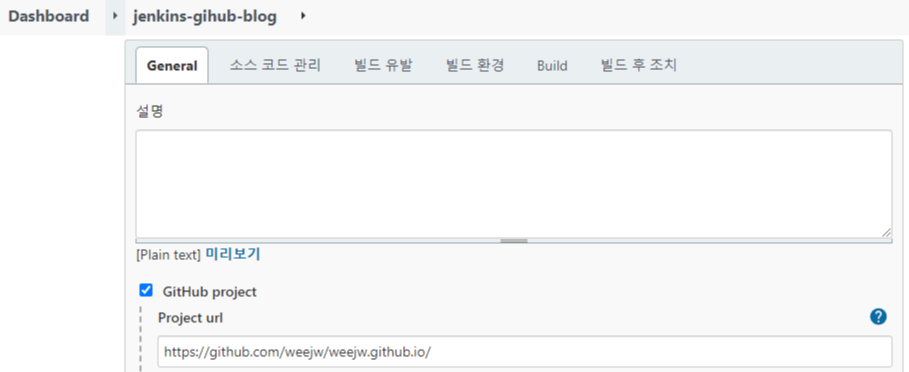
새 프로젝트를 생성하고( freestyle로 생성) 깃헙 프로젝트를 체크하고 자신의 레포 주소를 적어준다.
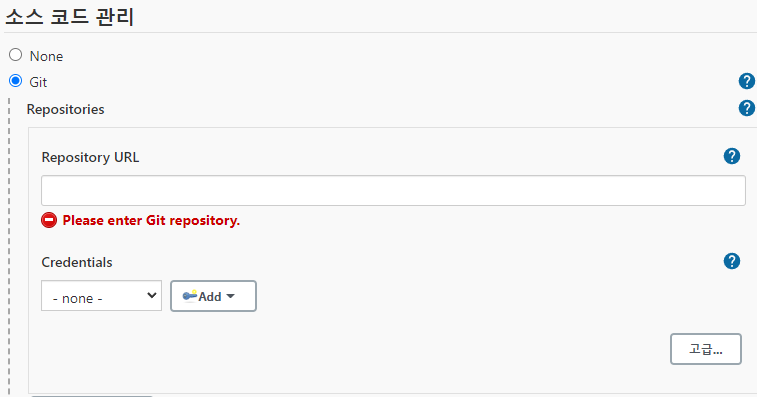
5-2. 소스 코드 관리
소스 코드 관리에서 Repo URL을 깃허브 url을 추가해주고 Credentials add를 해준다.
아이디/패스워드로 로그인할 수 있지만
나는 아까 생성한 공개-개인키를 이용할 것이므로 생성한 private-key를 입력해준다.
(이럴려고 depoly key를 미리한 것이므로..)
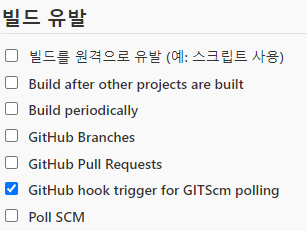
5-3. 빌드 유발 설정
hook로 설정해준다.
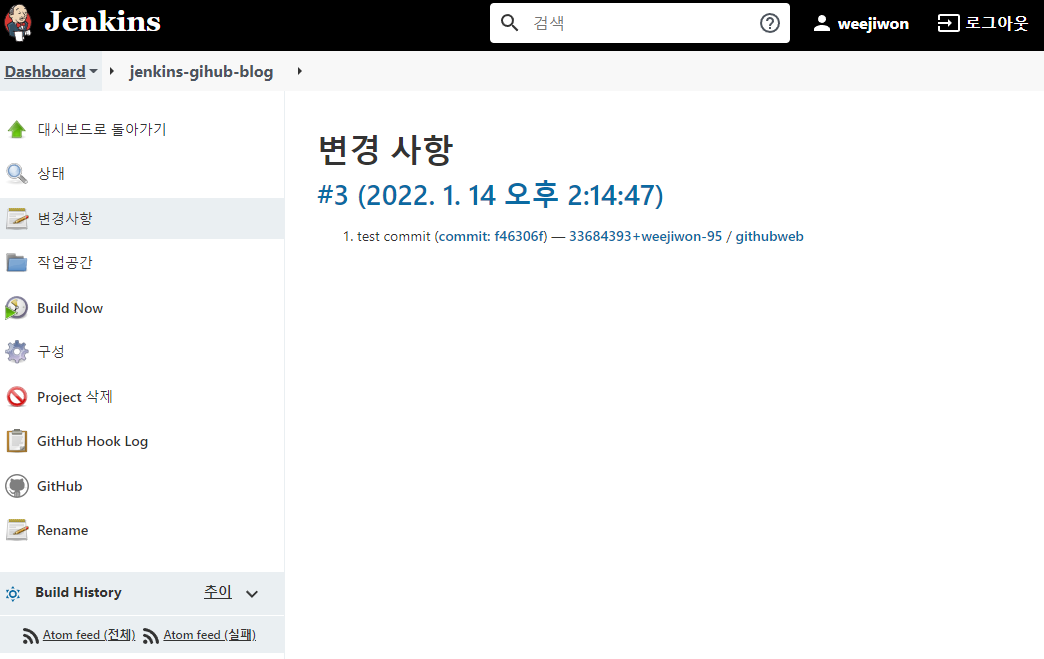
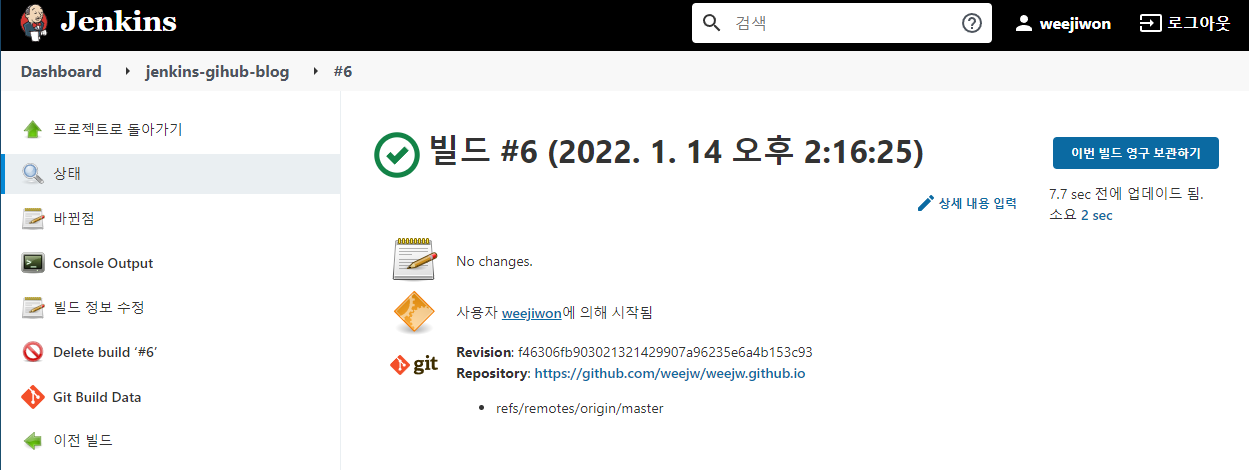
test commit을 하나 하고보니 연동이 잘 된 모습이다 :) 끝
3. Slack Alert 설정하기
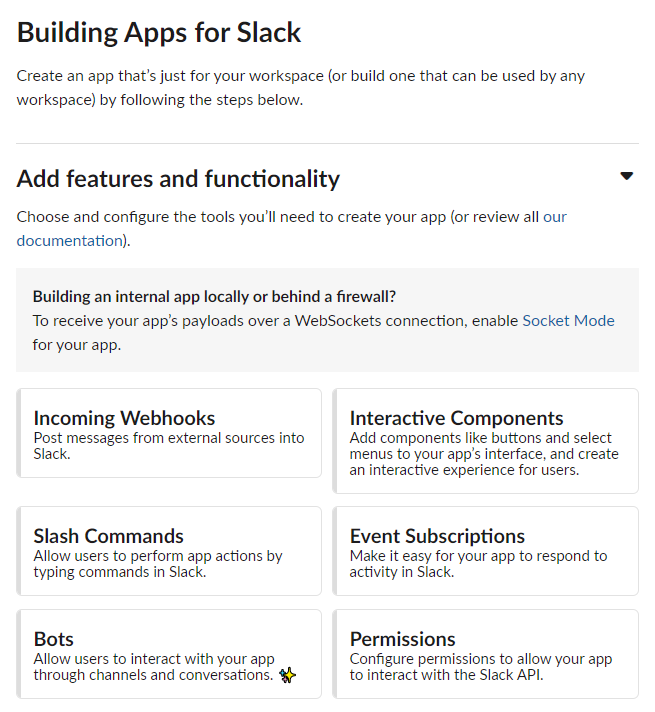
Github action result를 봇으로 받아보자. 여기에서 슬랙 봇을 생성할 수 있다.
incoming webhooks 로 만들고,
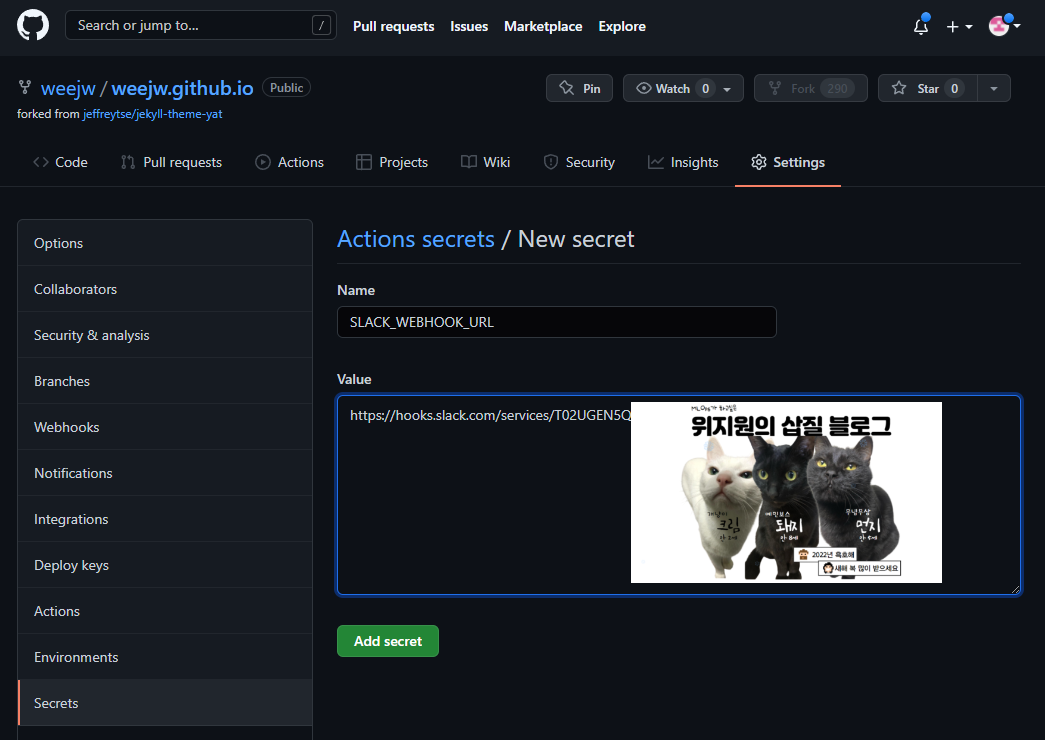
app을 만들고나면 app에 대한 URL이 생기고 이 URL은 github blog의 settings의 secrets에 넣어준다.
아까 위에서 잠깐 봤던 워크플로우에 있는 빌드 yml 파일을 수정한다.

아래와 같이 slack을 추가해준다.
name: Github Pages
on:
push:
branches:
- master # Here source code branch is `master`, it could be other branch
jobs:
build_and_deploy:
runs-on: ubuntu-latest
steps:
- uses: actions/checkout@v2
# Use GitHub Actions' cache to cache dependencies on servers
- uses: actions/cache@v1
with:
path: vendor/bundle
key: ${{ runner.os }}-gems-${{ hashFiles('**/Gemfile.lock') }}
restore-keys: |
${{ runner.os }}-gems-
# Use GitHub Deploy Action to build and deploy to Github
- uses: jeffreytse/jekyll-deploy-action@master
with:
provider: 'github'
token: ${{ secrets.GITHUB_TOKEN }} # It's your Personal Access Token(PAT)
repository: '' # Default is current repository
branch: 'gh-pages' # Default is gh-pages for github provider
jekyll_src: './' # Default is root directory
jekyll_cfg: '_config.yml' # Default is _config.yml
jekyll_baseurl: '/jekyll-theme-yat' # Default is empty
cname: '' # Default is to not use a cname
actor: '' # Default is the GITHUB_ACTOR
-name: action-slack
uses: 8398a7/action-slack@v3 # https://github.com/8398a7/action-slack
with:
status: ${{ job.status }}
author_name: weejw
fields: repo,message,commit,author,action,eventName,ref,workflow,job,took
mention: here
if_mention: failure,cancelled
env:
SLACK_WEBHOOK_URL: ${{ secrets.SLACK_WEBHOOK_URL }} # required
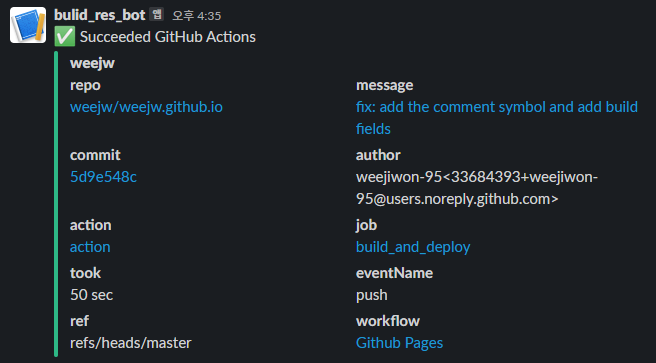
if: always() # Pick up events even if the job fails or is canceled.그리고 결과를 보면~ 완료~
왜 실패했쥬? 그건 이제 알아봅시당.. 암튼 여기까진 끝
REFERENCES
https://github.com/8398a7/action-slack
https://www.dongyeon1201.kr/9026133b-31be-4b58-bcc7-49abbe893044
https://brenden.tistory.com/90
https://kitty-geno.tistory.com/88
https://github.com/jeffreytse/jekyll-theme-yat
https://jekyllrb.com/docs/themes/#understanding-gem-based-themes
https://issueexplorer.com/issue/cotes2020/jekyll-theme-chirpy/383
https://zeddios.tistory.com/1222
https://velog.io/@zawook/Github-%EB%B8%94%EB%A1%9C%EA%B7%B8-%EB%A7%8C%EB%93%A4%EA%B8%B0-1
https://github.com/rbenv/rbenv
https://jjeongil.tistory.com/1312